Create Accounts Feature Detail Video
To create thousands of twitter accounts with the "Create Accounts" feature, it's easy and quick more than creating accounts one by one on the twitter website.
Before you create any accounts, please open "Manage Accounts" feature, you will find it blank as you can see below:
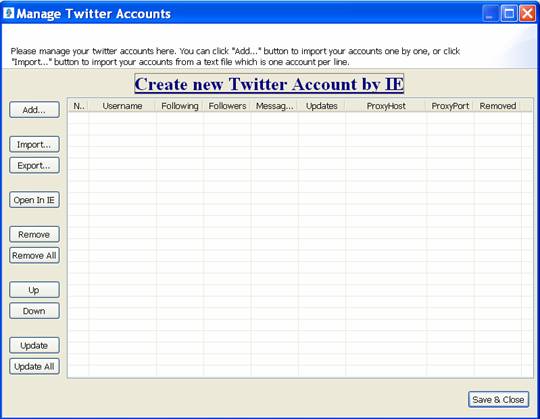
Now we can go back to create some twitter accounts with the "Create Accounts" feature, close the "Manage Accounts" box and go to "Twitter" menu, click it and you will see the "Create Accounts" feature there as follows:
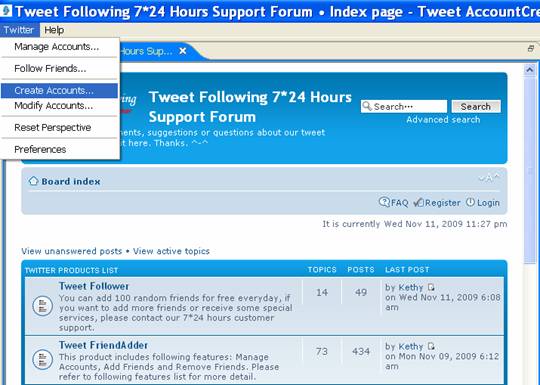
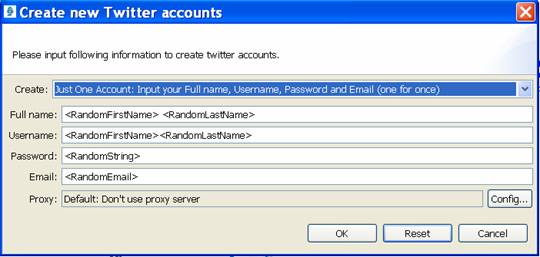
When you open the "Create Accounts" feature, there will be a new dialog box shows the parameter for creating accounts:
The most important parameter section is the "Create" option. Click the menu and there are several options for you to choose as follows:
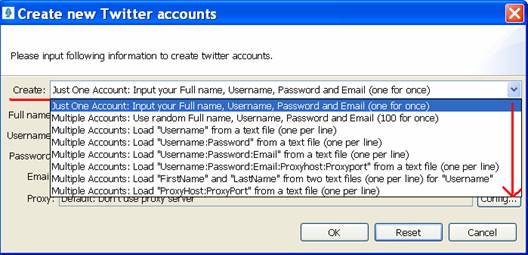
You can create just one account or create multiple accounts by different formats, such as creating multiple random accounts, or creating multiple accounts by loading "Username", "Username:Password", "Username:Password:Email","Username:Password:Email:ProxyHost:ProxyPort" or "ProxyHost:ProxyPort" from a text file, or loading "FirstName" and "LastName" from two text files.
Create a random twitter account If you choose this option, you can use the default settings to create a random twitter account, the full name, username, password, and email are random, as follows:
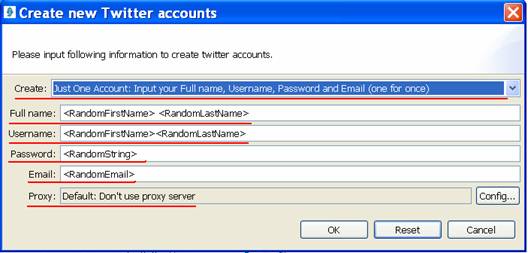
It will search a random first name and last name from our date base as your full name and username, then random string as password, the string contains letters and numbers, 6 in total. And a random email address. Also, you can copy other parameter from the any option of "Full Name" when selecting create multiple accounts and paste it instead of random first name and last name like this:
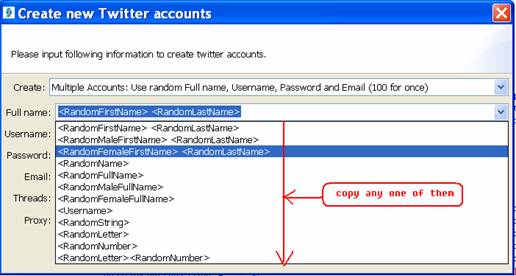
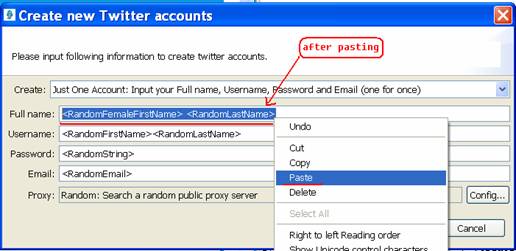
As to the "Proxy", there are three options for the proxy server settings, click "Config" button and a new dialog box will appear like this:
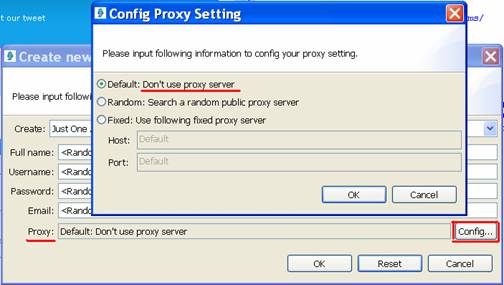
"Don't use proxy server" means create twitter accounts under your own IP, but one IP can only create 10 accounts at most, then you need different IP when you want to create more than 10 accounts.
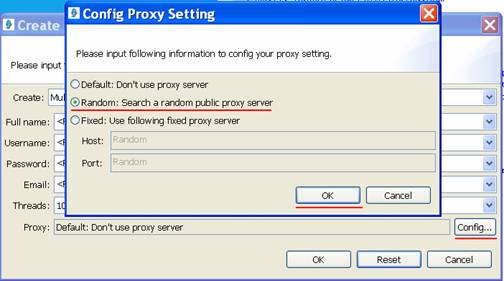
The second option is just for you if you want to create many accounts, select it and it will automatically "search a random public proxy server" from the public website for each account. This option is more important when you create multiple accounts than 10, of course you can select it for just one account.
The third option is to create accounts with a fixed proxy server, this way you also can only create at most 10 accounts.
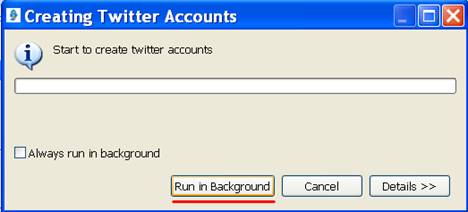
We choose "Don't user proxy server" for just one account as an example here. Click "OK" and wait for a while, run in background or not:
After a while you will see a captcha code box like this:

Type the code correctly and create this account successfully.
This is the information in the console, created one account successfully, you can see the random full name, username, password, email and default proxy with red underlines:

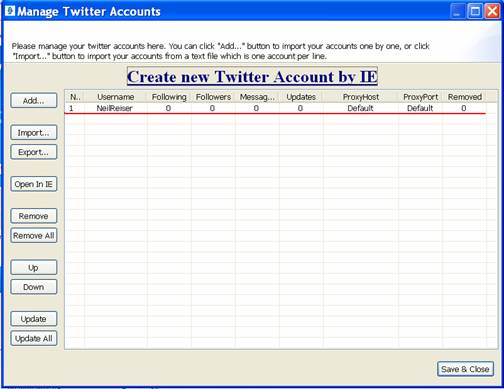
And this new account will be listed in the "Manage Accounts" dialog box, with no following, followers, messages, updates:
Create an exact account Just input your own full name, username, password, and email in corresponding place. Remember that there should be no blank in the username. The same next steps and create account successfully.
Make a random account more unique Of course you can insert a field in the full name, username, password, or email to make your account unique, such as insert "2009" behind the username and some other field as follows:
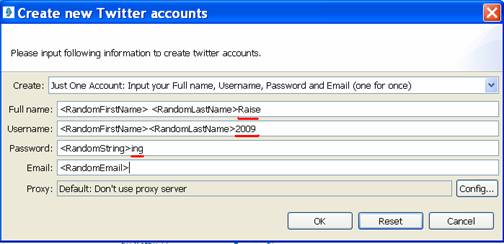
It will create an account with the field you inserted.
Create multiple random accounts: Use random full name, username, password and email (100 for once)
This way is to create multiple random accounts with random parameter, you can use the default settings as follows:
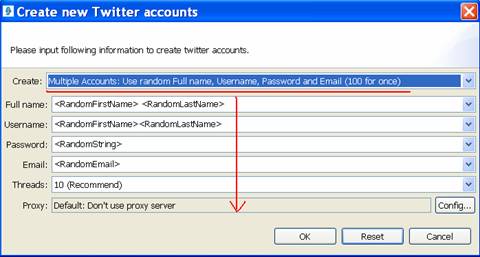
Of course there are several other options for you to choose as the full name and username see below:
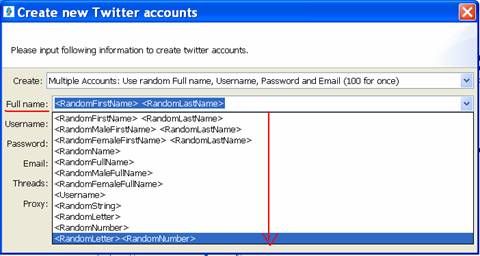
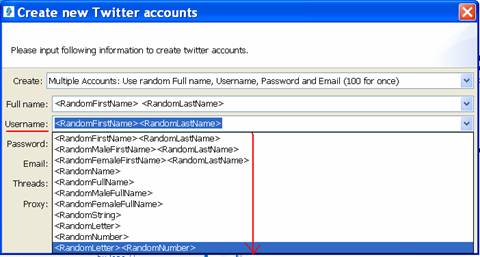
And several other options for password and email as follows:
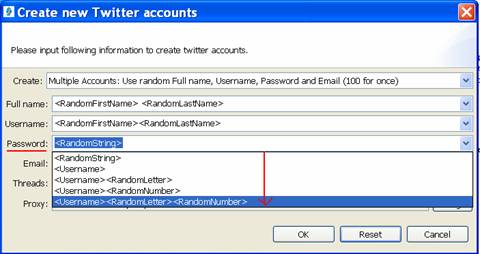
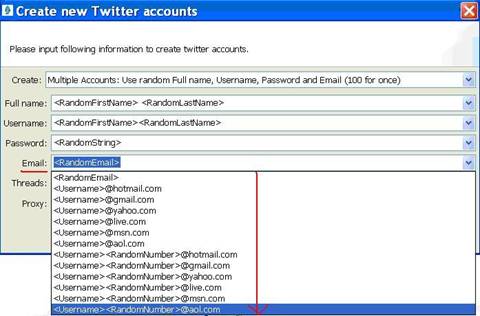
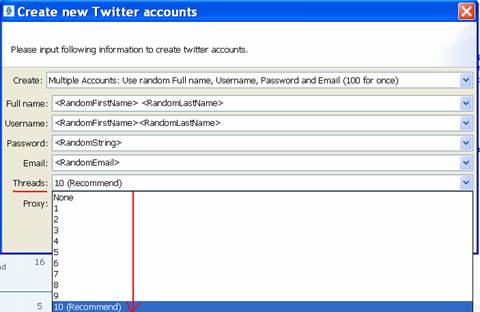
The "Thread" is used to control the speed of creating accounts, it's from 1 to 10, the more the faster, generally speaking, creating accounts takes a few time to search the proxy and check the proxy, so the recommended thread is "10 Thread" as follows:
The "Proxy" is now very important since you want to create multiple accounts, you should select the second option so that it can search a random proxy server for each account as follows:
As we said before, you can insert something to make those random accounts unique, for example, insert a field "2009" behind the username, as follows:
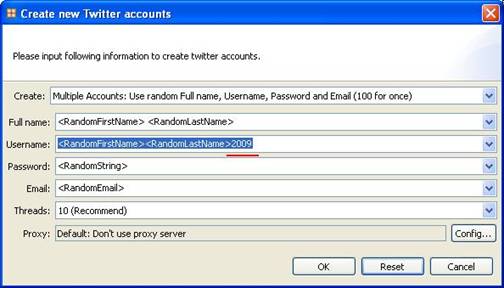
But the username should be no more than 15 characters.
So many options for the settings, we take the default parameter to create multiple accounts, just click "OK" and wait to type the captcha codes, how many accounts you want to create, how many codes you need to type. After a while the captcha code will appear, there is a service, if you don't want to type the codes by yourself, you can use the service, it will type the captcha codes for you automatically:

Before using this service, you need to go to the DeCaptcher.com and register to be the member, click it and you will get to this page:
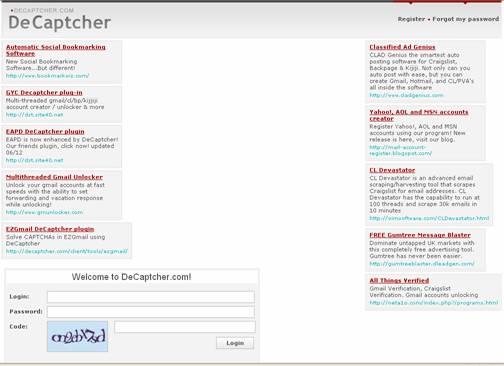
After registering, just input your username, password, host, port in corresponding place and click "OK" to enjoy this service. Or click "Cancel" to exit.
It is now creating accounts with typing captcha codes automatically, and the creating status in the console as follows:
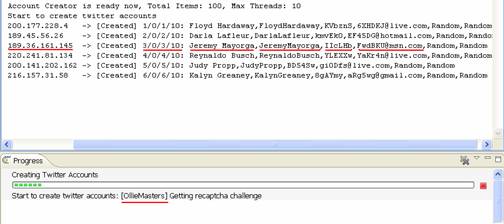
If you don't want to create accounts any more, just click the red button as follows:

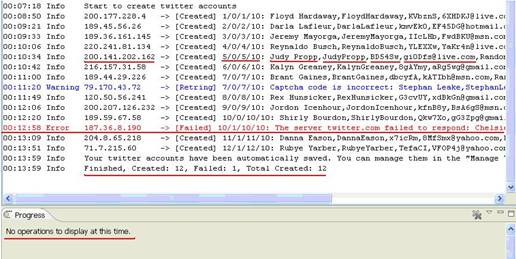
It shows created 12 accounts, full name and username made of random first name, random last name, random password and email, and together with proxy server for each accounts. Sometimes the internet is not very steady and will fail to create some accounts, so it shows a red line of message as follows:
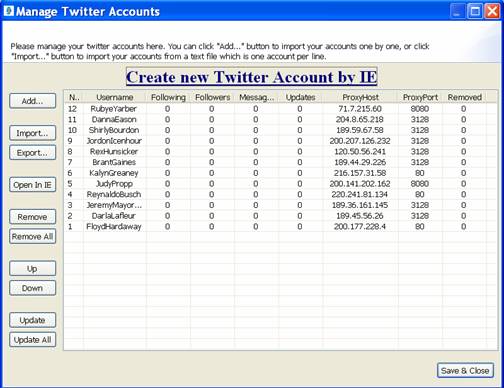
The newly created accounts are now listed in the "Manage Accounts" dialog box:
Create accounts by loading "Username" from a text file, one per line. Above is to create some random twitter accounts, now we are going to create some more real accounts, that is loading "Username" from a text file, this means your username are not random one, but other information is random.
Go to the "Twitter" menu and open the "Create Accounts" feature, select this option to create some accounts:
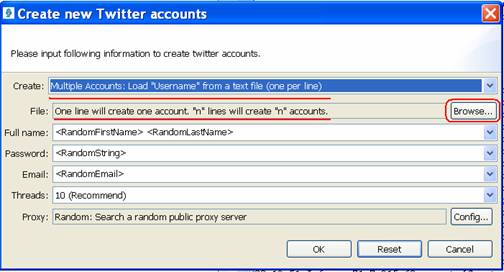
Creating accounts with this option, you need to input your usernames in a text file first, one per line, how many accounts you want, how many lines you should put in the file, like this:
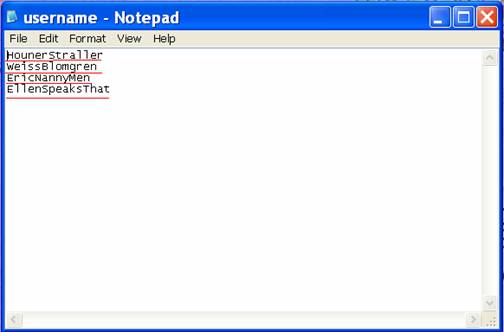
When you create accounts with this option, just click "Browse" menu to find the text file and open it:
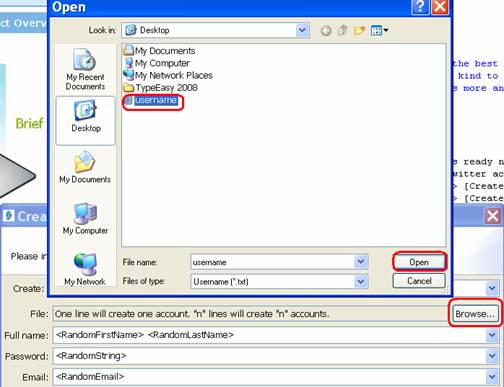
Then use the default full name, password, and email, or select any one of the options, there are 4 lines of username in the text file, so we can get 4 accounts if things go well. Click "OK" and wait to type the captcha codes or let it type itself by the service, several seconds later, the four accounts created by usernames in the text file will be listed in the "Manage Accounts" box as you can see below:
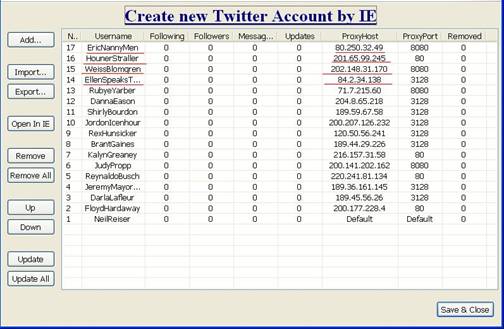
Each account has its own proxy server searched by the software.
Create accounts by loading "Username:Password:Email:ProxyHost:ProxyPort" from a text file, one per line The six options to create accounts are similar, you need to load your own information from a text file to create accounts, such as load "Username:Password:Email:ProxyHost:ProxyPort" from a text file, one per line, the username, password, email and proxy should be separated by colon, like this:
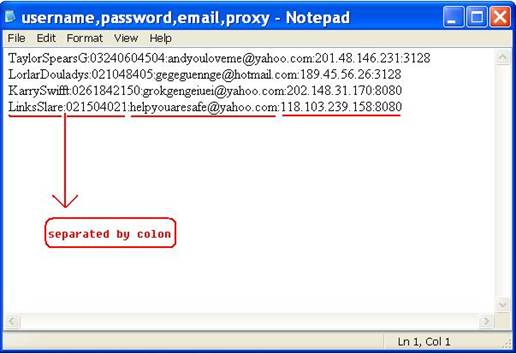
Make sure that the usernames and emails in the text file haven't been taken, and the proxies are available. When you create accounts by loading "Username:Password:Email:ProxyHost:ProxyPort", you will see the "Browse" button and "Build" button, the "Build" function makes creating accounts more flexible, you don't have to put the information in a text file, you can put the usename, password, email, and proxy in four text files as you like:
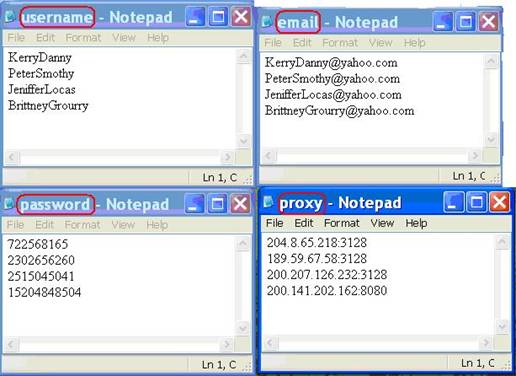
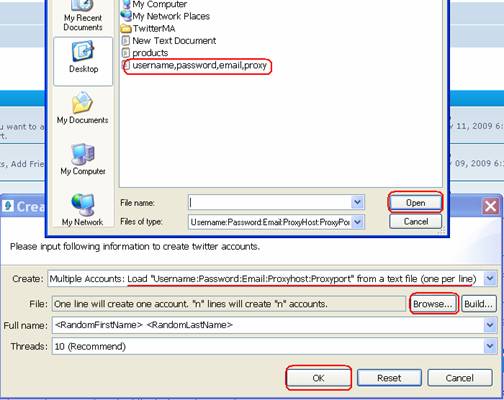
When you create accounts, just click "Browse" button to find the one text file which contains all information, or click "Build" to find the four text files respectively as follows:
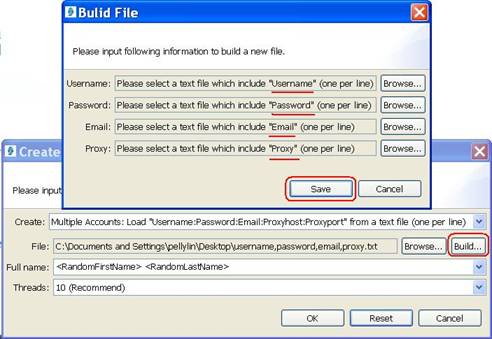
Save the four text files into another new text file, all information will be saved in the same text file as we saw before. For the convenience, we choose "Browse" function and create some accounts, use default settings as full name and thread, the parameter is below:
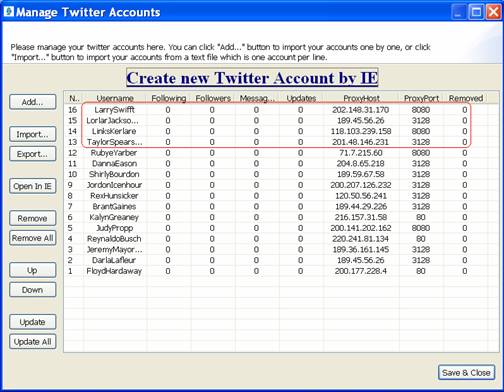
And type the captcha codes manually, after it has created, the four accounts will be listed in the "Manage Accounts" box like this:
Create accounts by loading "FirstName" and "LastName" from text files
This option is a little different from others, you need to load your "FirstName" and "LastName" from two text files as follows:
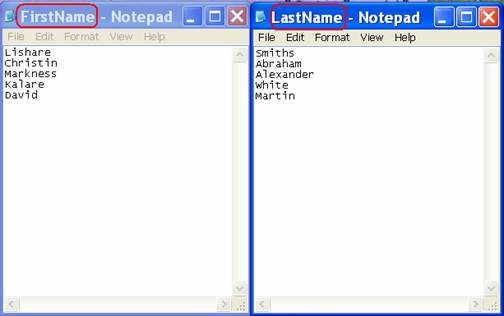
There should be the same lines in the two text files, if the firstname has 4 lines, then you can create only 4 accounts but not 5 accounts.
Then when you create accounts, just click "Browse" button and open the two text file like this:
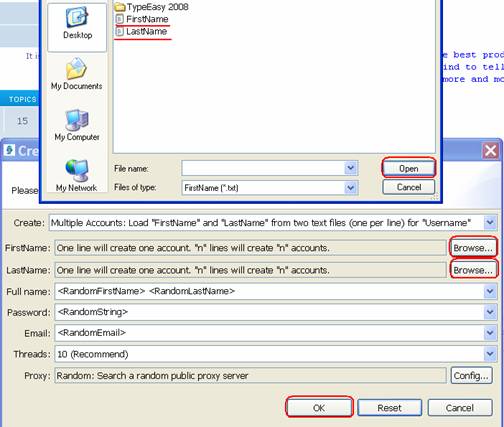
Remember to select the "Search a random public proxy server" option, at last click "OK" and wait to input the captcha codes. For the reason of "username has been taken" and "internet connection problem" in the console below, failed to create 2 accounts this time, it's very important to put some unique "FirstNname" and "LastName" in the two text file.

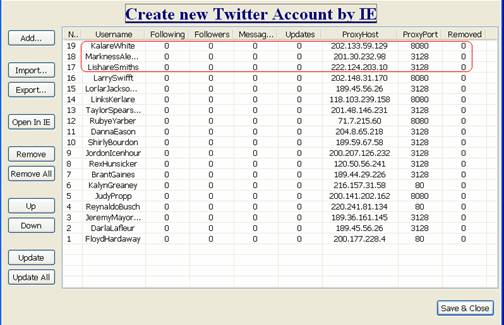
Only 3 accounts are created successfully, they are listed in the "Manage Accounts" box now as you can see above.
|


