Manage Proxies in TweetFollowing 1.0.0 Learning Center
Help /Twitter /Features /Manage Proxies /
|
Manage Proxies Feature Detail Video
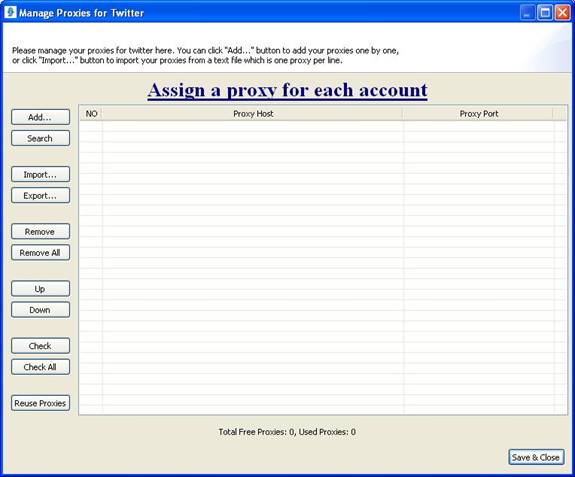
You can manage proxies by this feature, no matter your own proxies or random free proxies. Following is the interface of this feature:
If you want to use proxies urgently, click the following button to assign proxies for your accounts immediately.
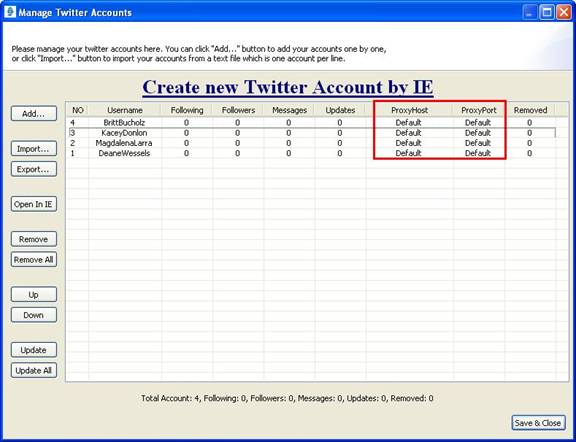
It will search random free public proxies and assign them for your accounts. After clicked it, just turn to "Manage Accounts" dialog. It will assign proxies for all the accounts whose proxy settings are default in the "Manage Accounts" dialog, just like this:
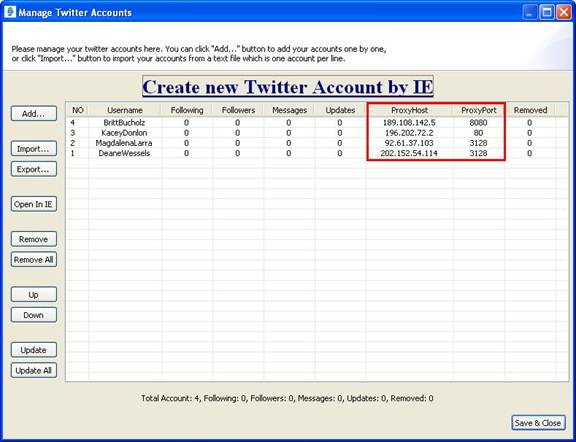
Notice: It will still search proxies after finished assigned proxies for the accounts, and save them in "Manage Proxies" dialog as follows:
That is because it searches with 10 threads at the same time, but it works in the background, so it shows no operations to display at this time in the progress as follows:
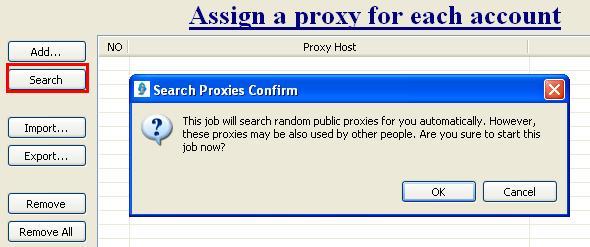
If you just want to search some free random public proxies, click "Search" button as follows, it will search random public proxies, and save them in the dialog, then you can use the proxies next time.
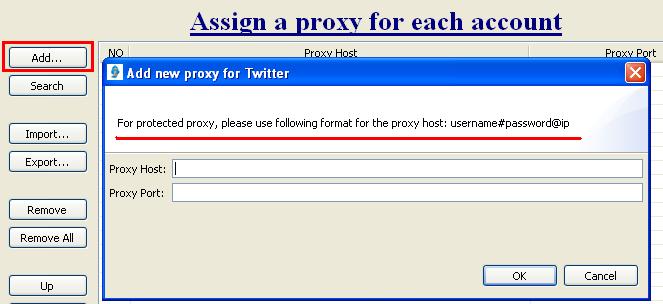
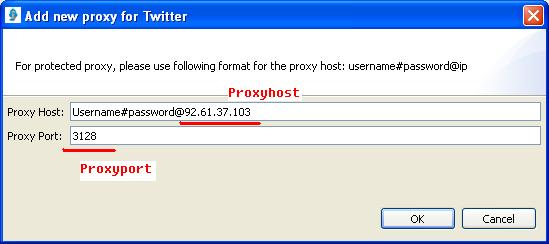
Click "Add" button to add your own proxies one by one as follows:
If you want to add some private proxies, need to input username and password to log in, just use the following format for the proxy host:
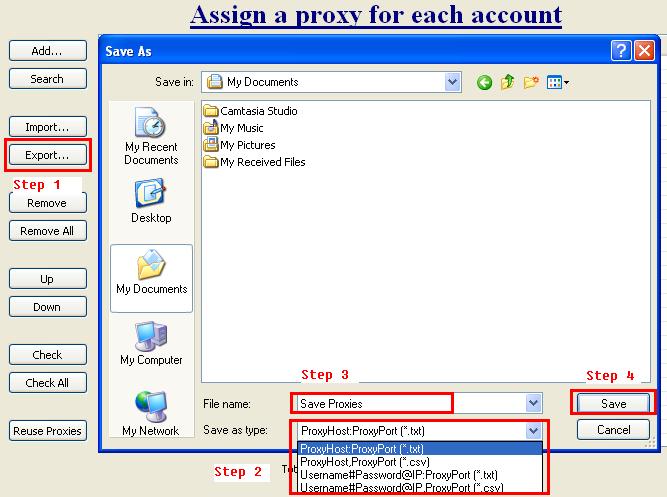
Click "Export"-->Select any one text format-->Name the file-->Click "Save" to save it.
Notice: If the proxies are free, just select the first two formats, if the proxies are private, select the last two, it will save all the proxies username and password.
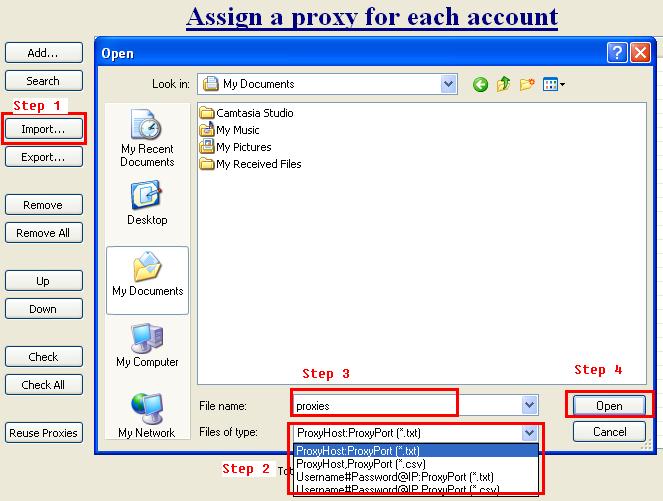
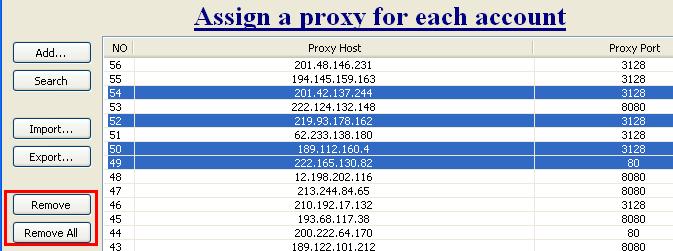
Notice: You need to select the same text file format as you created before. Delete any proxies or all proxies from the dialog as follows: (Press on "Crol" key to select multiple proxies to remove)
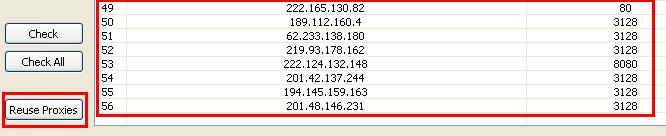
Press on "Corl" key to move multiple proxies. Click "Reuse", the used proxies will be listed again in this dialog as follows:
These proxies were assigned for accounts before, no matter you have removed them from "Manage Accounts" dialog or still be listed in proxy field, they will be listed in this dialog again.
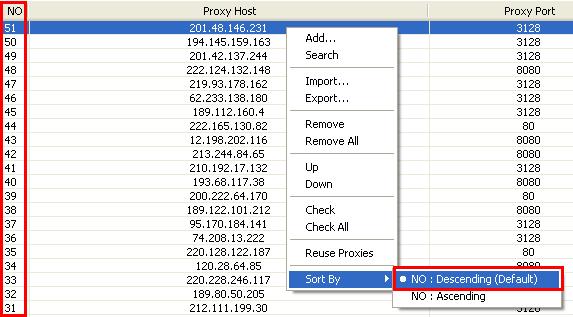
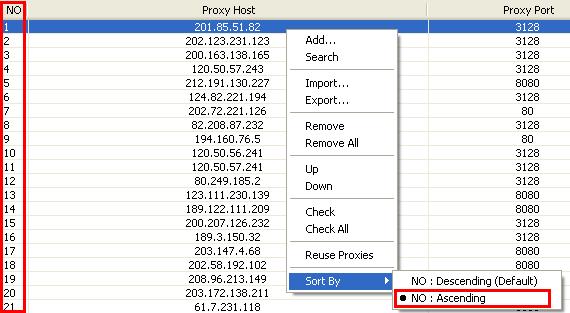
Press on "Corl" key to check multiple proxies, it will delete the dad proxies from the dialog automatically. Right click mouse, a right click menu appears, list the same functions as left side, and you can sort proxies by descending or ascending as follows:
That's all, if you have any question or suggestion, just feel free to contact our 7&24 hours customer support.
|