Post Twitter Updates in TweetFollowing 1.0.0
Help /Twitter /Features /Post Twitter Updates /
|
Post Twitter Updates Feature Detail Video
The "Post Twitter Updates" feature is used to post updates for your twitter accounts, it's just like you are writing "What are you doing" on the twitter website. But with this feature you don't need to login your accounts on the website and write updates one by one.
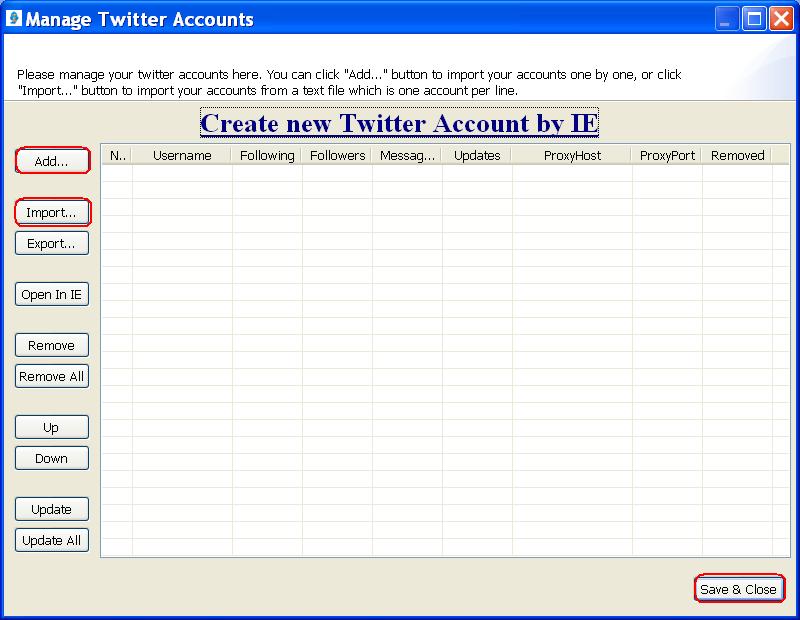
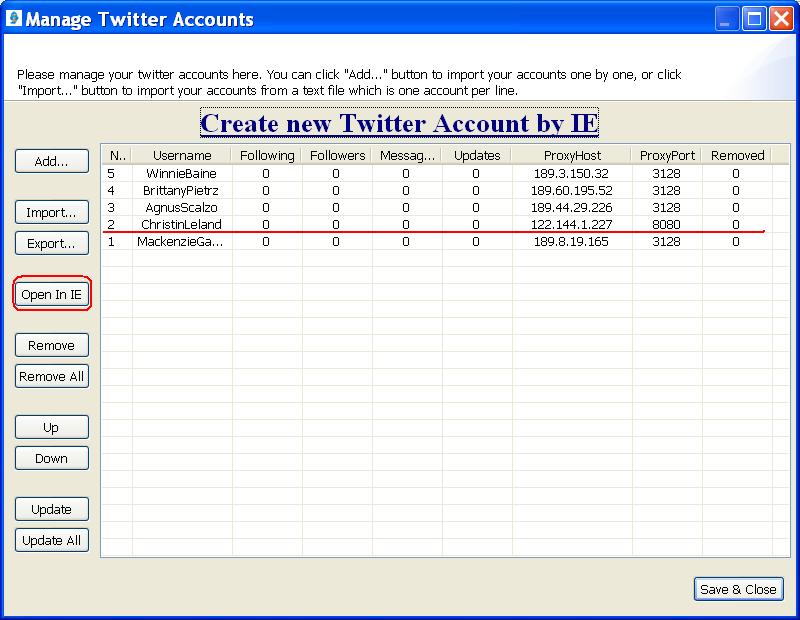
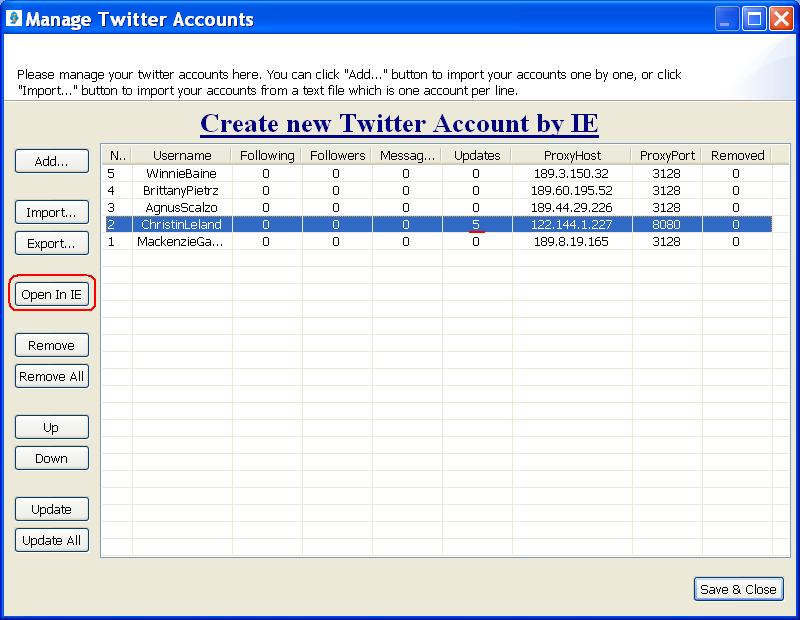
The same step as other features, you need to add your accounts into the "Manage Accounts" dialog box first. Go to "Twitter" menu and open "Manage Accounts", add or import accounts as follows:
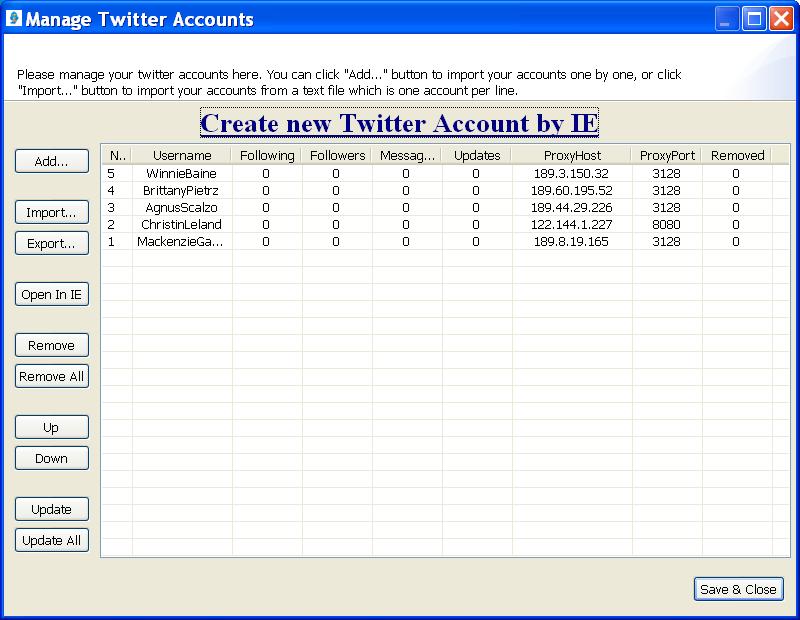
Then your accounts will be listed in the box below:
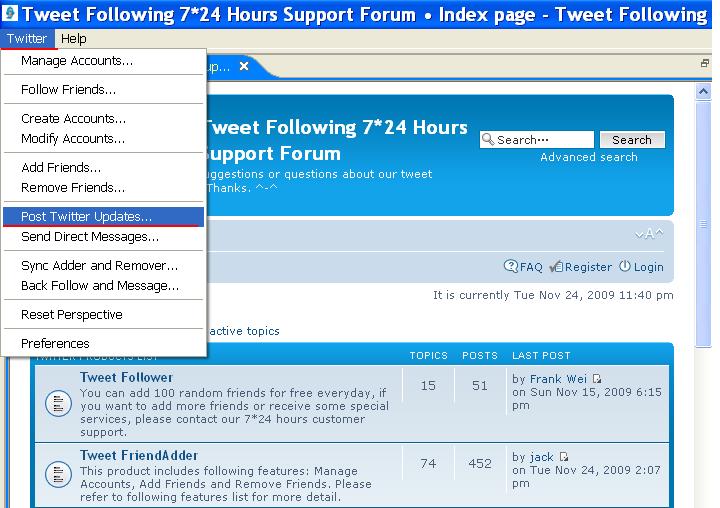
After adding accounts into the "Manage Accounts" box, now we go to post updates for those accounts. Go to "Twitter" menu and find "Post Twitter Updates" features as follows:
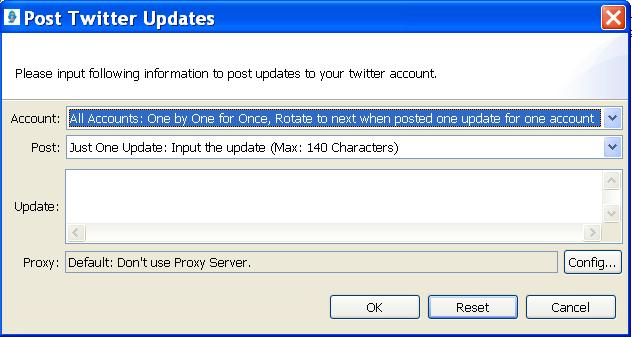
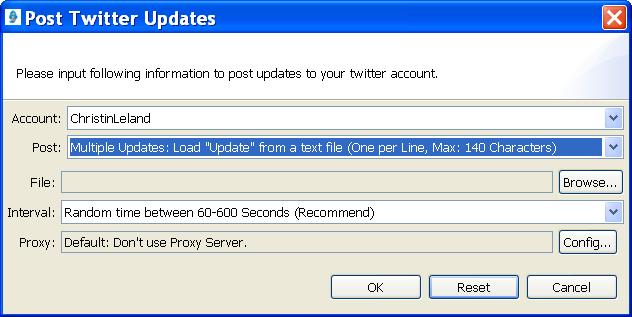
When you click "Post Twitter Updates", there will be a new dialog box as you can see below:
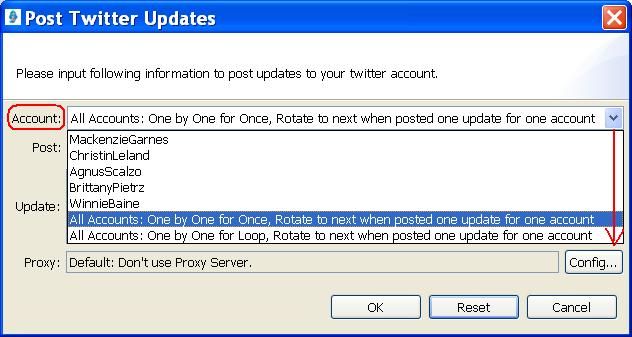
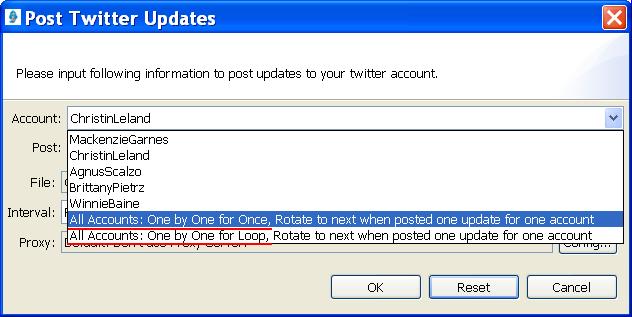
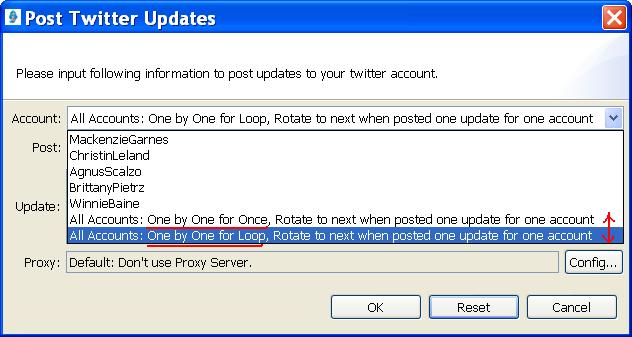
There are two main sections in this dialog box, one is about "Account", and the other one is about "Update". Click the "Account" pull-down menu, you can see there are some options as follows:
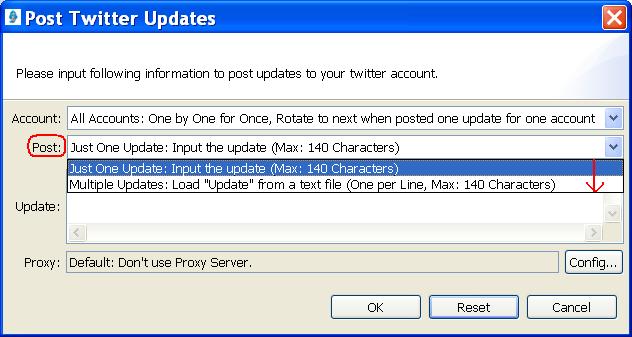
Your twitter accounts will be listed here too, you can post updates for any one of your accounts, or post updates for all accounts, one by one for once or for loop. Click "Post" menu and it is like this:
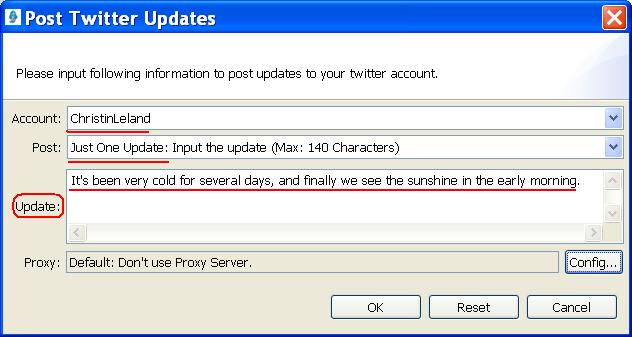
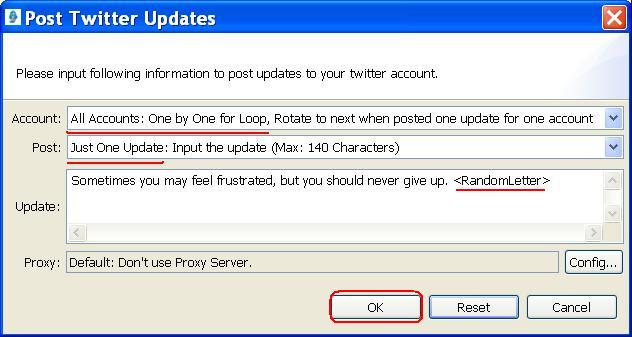
You can post just one update or post multiple updates for your accounts. Let's start from just one account, choose any one of the accounts as you like, and post just one update. Input your update in the blank box within 140 characters:
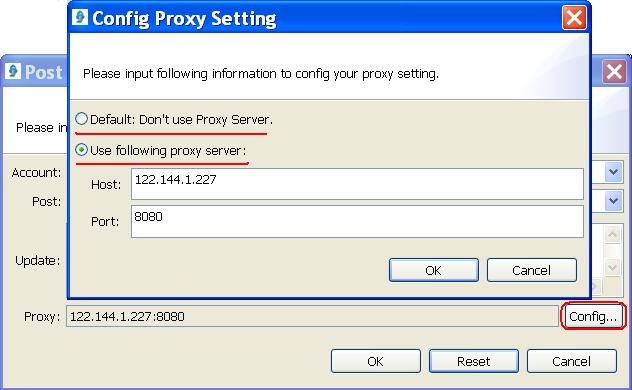
As to the proxy, if you click "Config" button, you will see a new dialog box, two options for you to choose as follows:
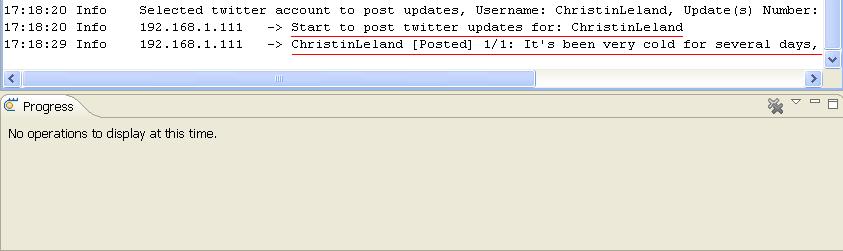
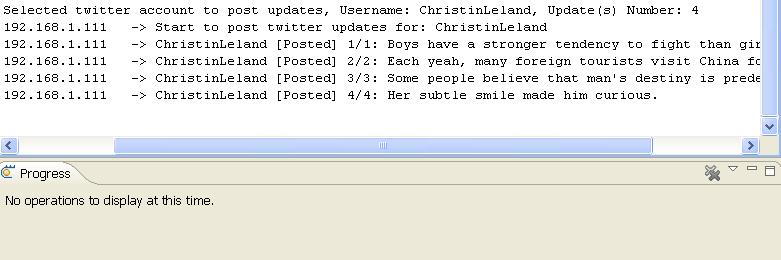
Choose "Don't use proxy server", it will post updates with your own IP, choose "Use following proxy server", it will post updates by the account's proxy server as you can see above. Usually we don't use proxy server. At last click "OK" to post just one update for that account. A few seconds later, in the console it shows:
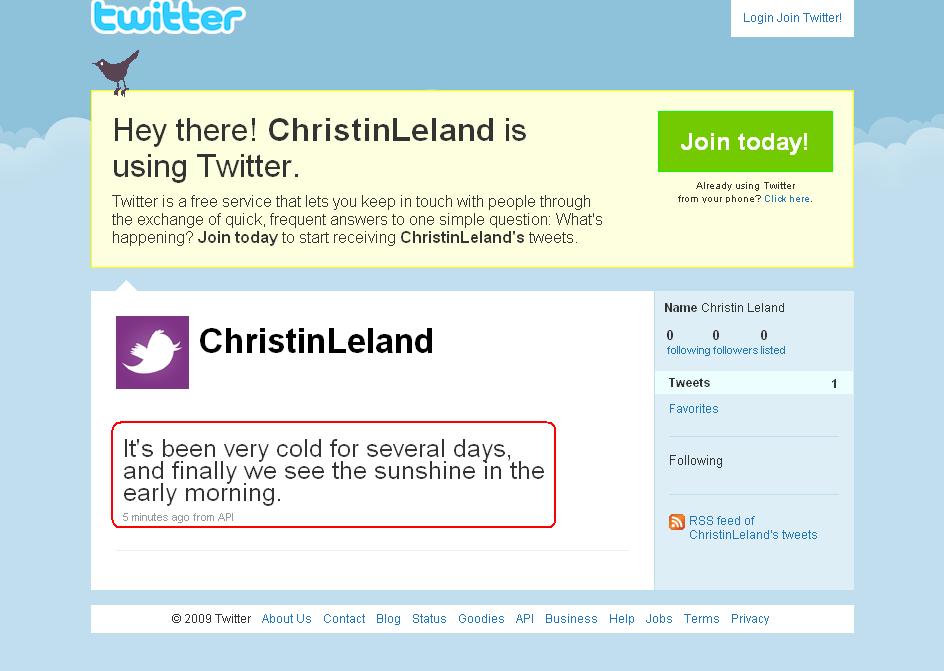
And we can check the update on the website, go to "Manage Accounts" and open this account in IE as follows:
Then you will see the homepage of this account below:
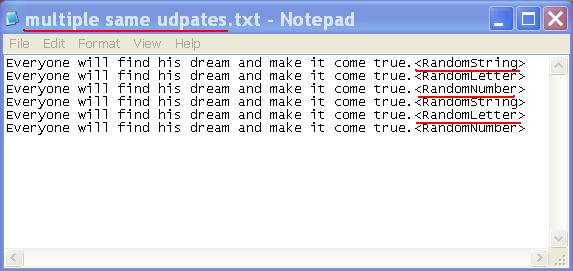
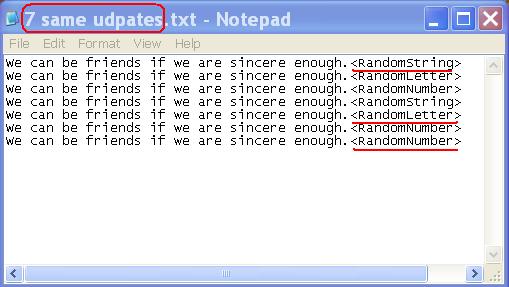
Please pay attention to the red underline in the second text file, insert One of the rules on twitter.com is that you can not post the same updates, if you post one update for multiple or post multiple same updates for your accounts, they will easily suspend your accounts. Insert the above field to make your updates different so that to keep your accounts safe.
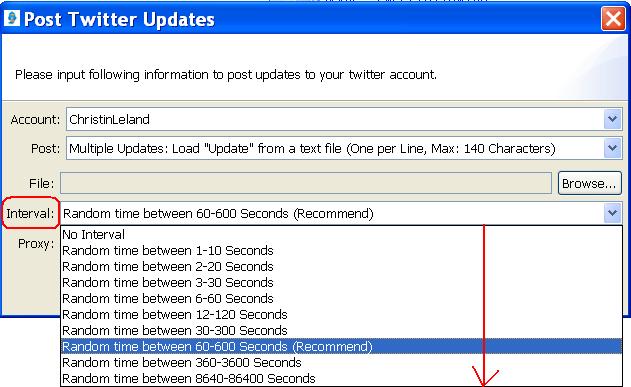
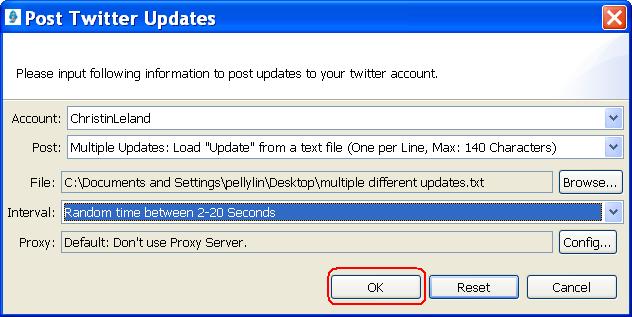
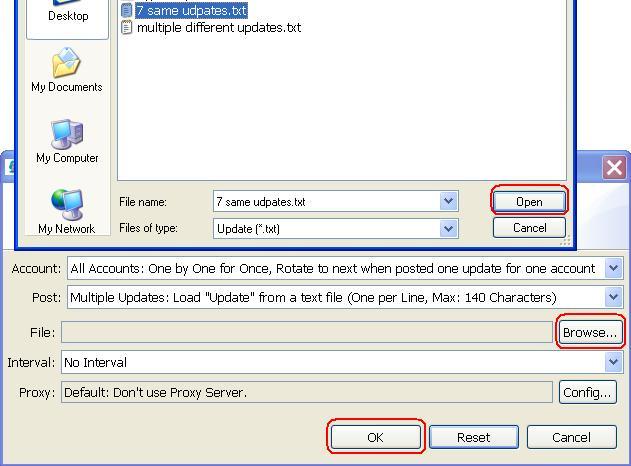
You need to click "Browse" and find the text file which contains the updates, we select the different updates text file. There are several options for the interval field as you can see below:
When you post multiple updates, there is an interval option, choose no interval and it will post one by one fast. If you choose the recommended interval, it will stop at a random time between 60 and 600 seconds after posting one update. Select "Don't use proxy server":
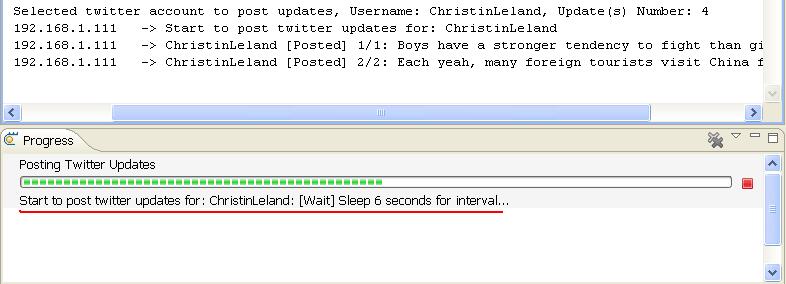
At last click "OK" and wait for the result. You can see from the bottom of the console, it will stop at a random time between 2 and 20 seconds after posting one update:
It has finished posting all updates in the text file for this account as you can see the information in the console below:
We can go to "Manage Accounts" dialog box and open this account's homepage:
Now what you see is the homepage of this account and the updates we posted just now:
It means post multiple updates for just one account successfully.
When you choose "one by one for once", it will post one update from first account until to last account, then stops. When you choose "one by one for loop", it will post for all accounts and then jump to the first account and so on, until you stop it.
Click "OK" and wait for posting update for loop.
If you want to stop, just click the red button in the above picture.
The 7 updates can be the same or different, we put 7 same updates in a text file and insert some field behind the updates as follows:
Now we post for all accounts by the updates in this text file, just click "Browse" and find the text file and choose no interval, don't use proxy server. Finally, click "OK" to run:
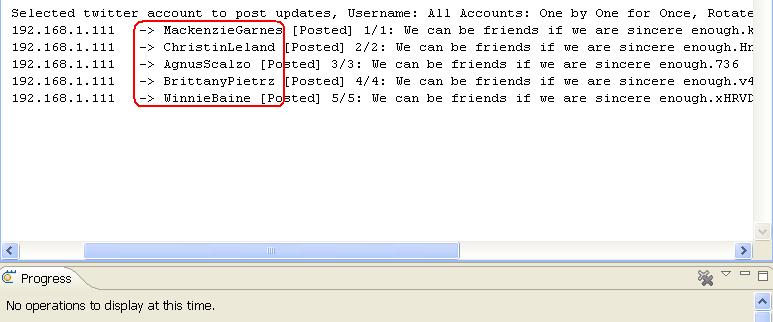
It has finished posting multiple updates for all account "one by one for once", you can see from following picture, it didn't loop. Each account got one update and stop.
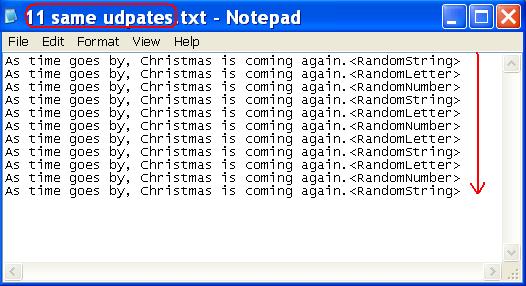
Below is the text file which contains 11 same updates, you will see later in the console the first receive 3 updates and other 4 accounts get 2 updates each.
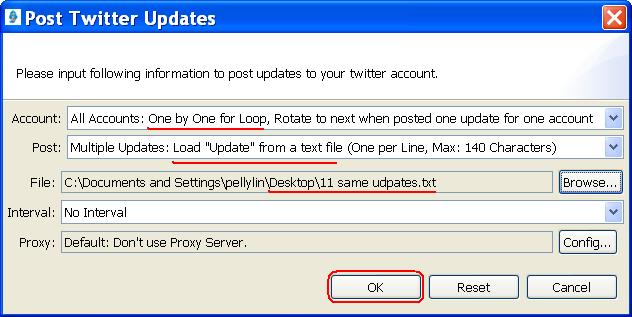
The same step to click "Browse" and find the text file. No interval, don't use proxy server. And click "OK" to run:
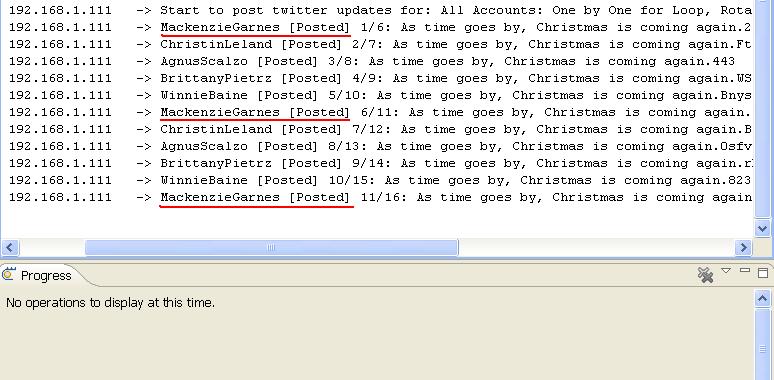
This is the result in the console, obviously the first account receive 3 updates:
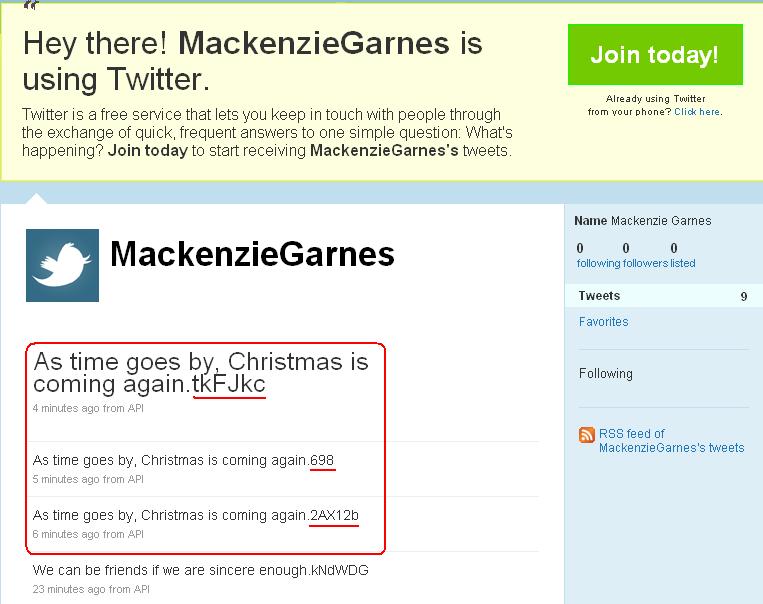
Of course we can check the result by opening the homepage of the first account:
One more important thing: You need to put at many updates as your number of accounts in the text file, to make sure each account will receive one the update. That's say, if you have 10 accounts and want to post multiple updates for all accounts, you put only 9 lines of updates in the text file, then it will only post 9 updates and your last account won't receive the update. |